The COBRA 18M comes in two power configurations, the 9V battery, and a 14.8V internal rechargeable. If the module was purchased as a 9V module an upgrade can be performed to add the rechange and external power functions to the 18M. Please see the below instructions on installing the Lipo Upgrade and completing the calibration steps on your COBRA 18M Firing Module.
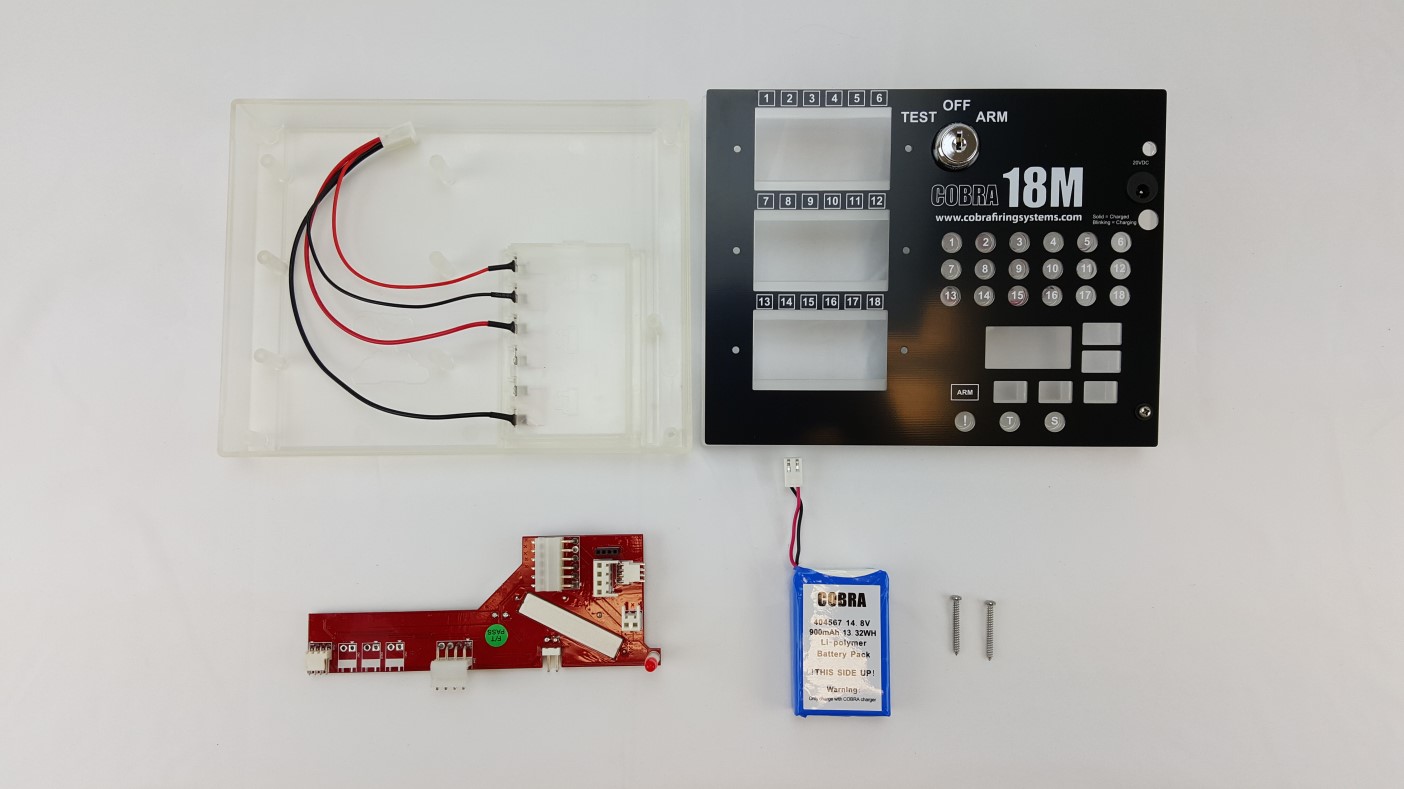
Parts Included
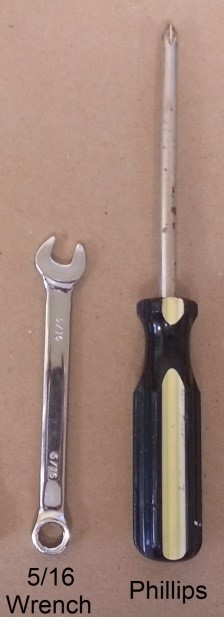
Tools Required
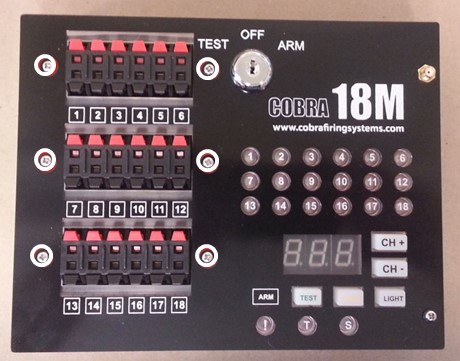
1. Remove the six screws from the front and the four screws from the back of your module.

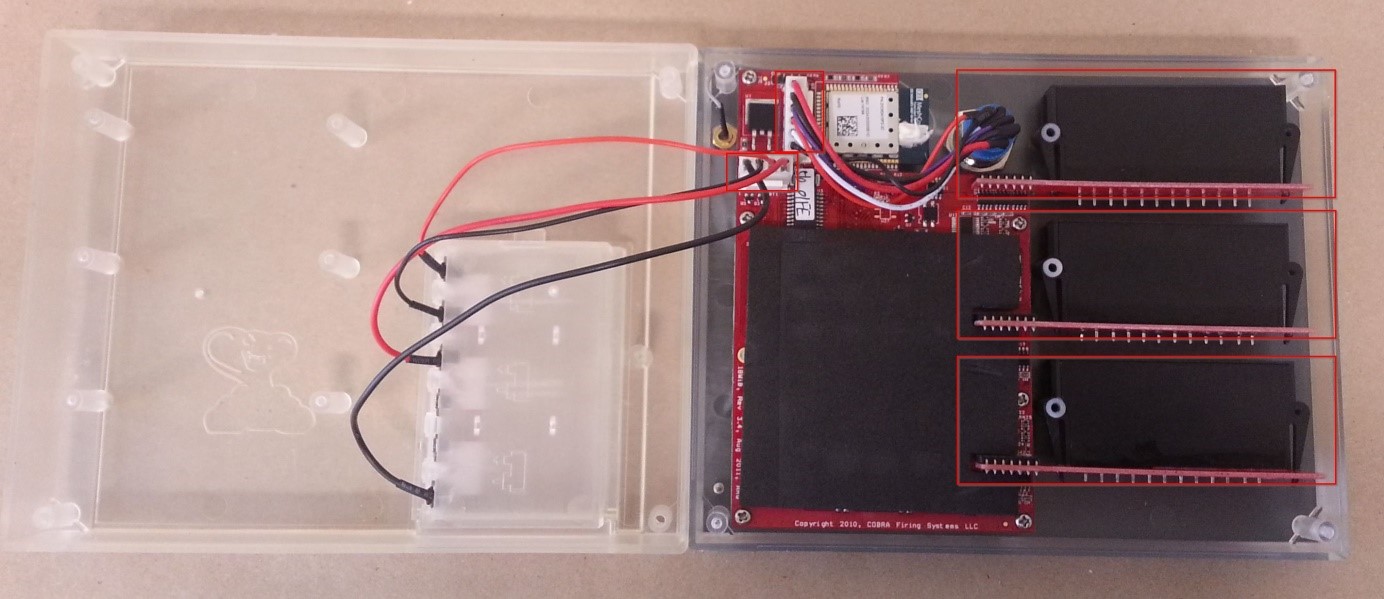
2. Disconnect the battery harness and key switch plugs. Next, remove the three cue strips.
3. Use a 5/16 wrench to remove the antenna nut.
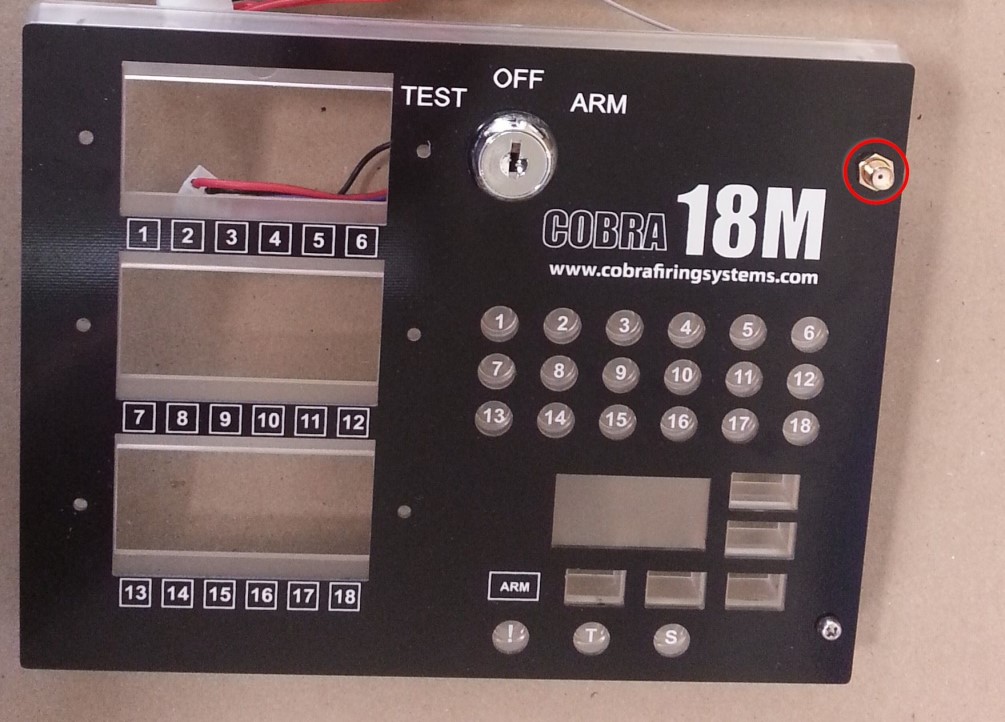
4. To remove the antenna, push it out on a hard surface such as a cutting board or workbench.
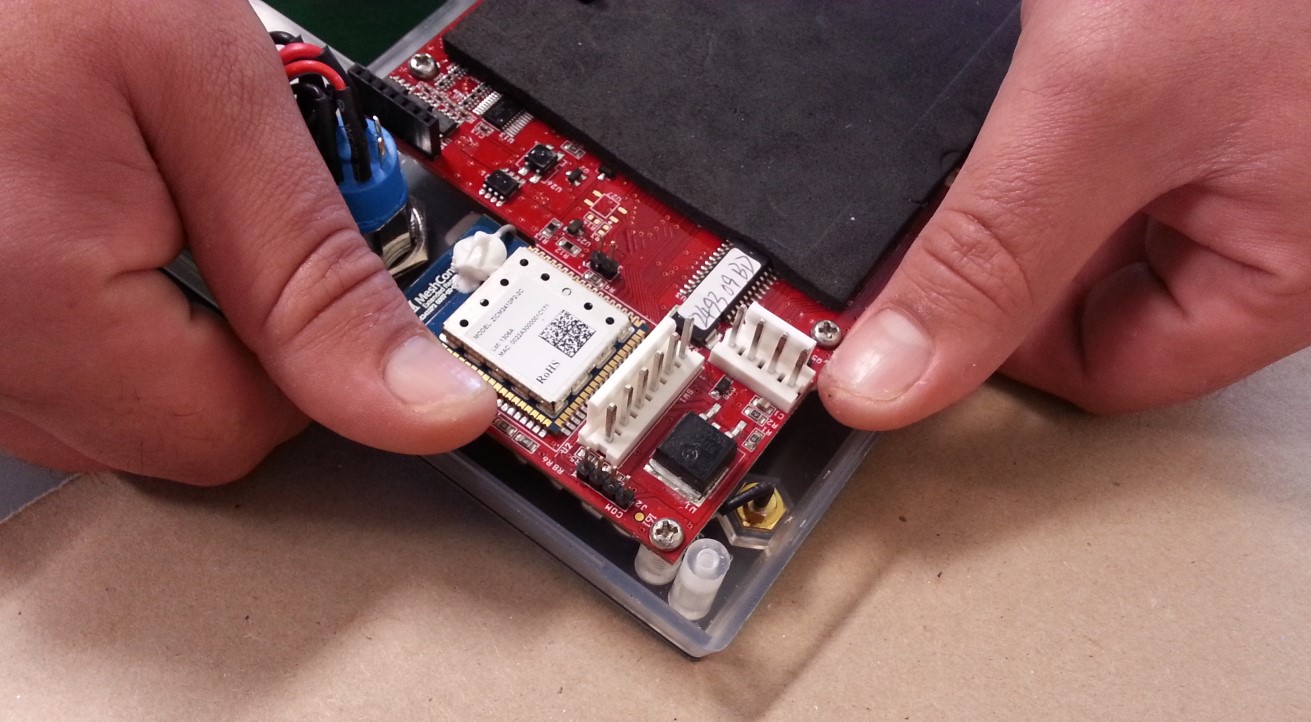
5. Unscrew the six screws holding the Motherboard in place
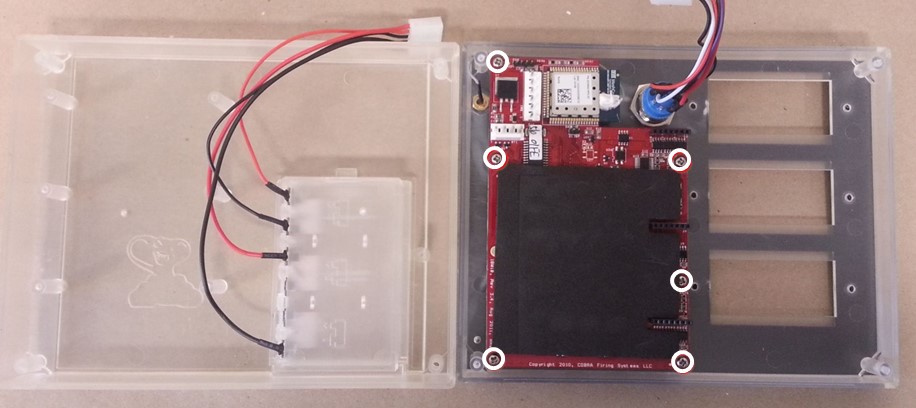 6. Remove the motherboard.
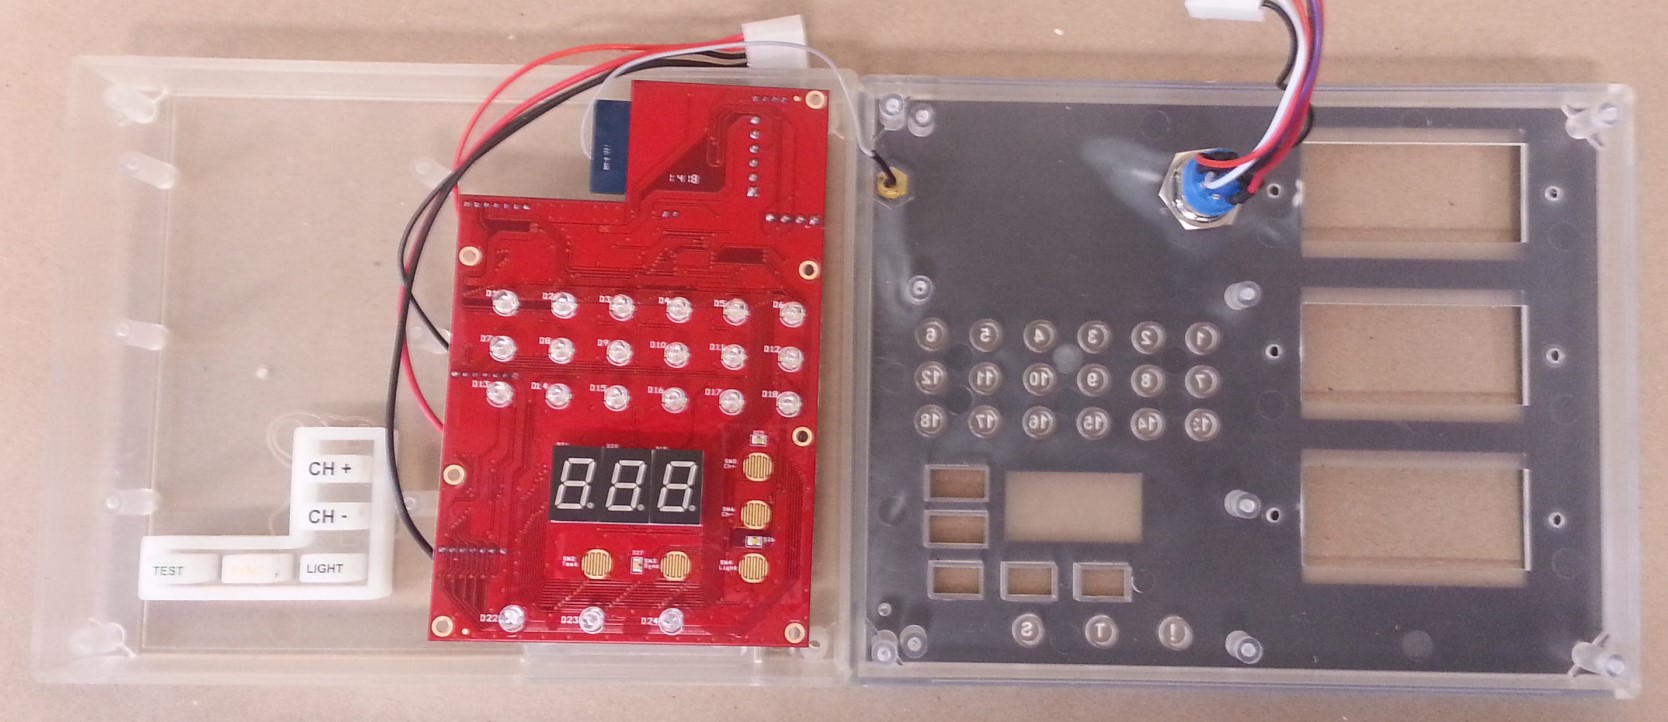
7. Your module is now disassembled.

8. Install the keypad into the new recharge upgrade kit enclosure.
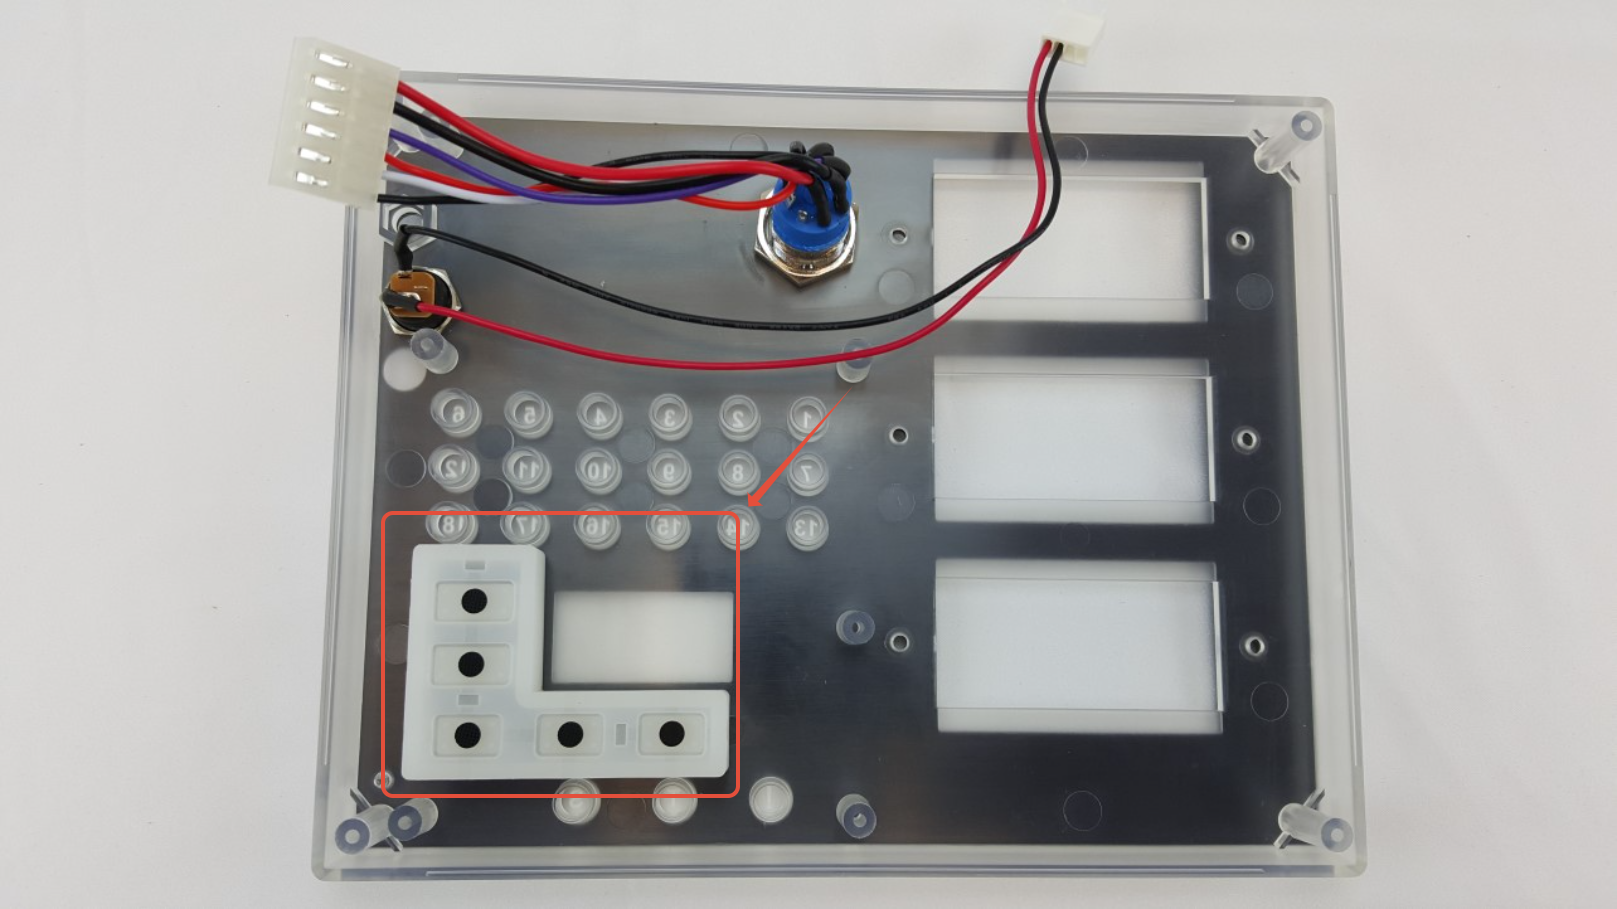
9. Bring the charge port wire (a) through the second cue strip bay. Move the power wires (b) out of the way.
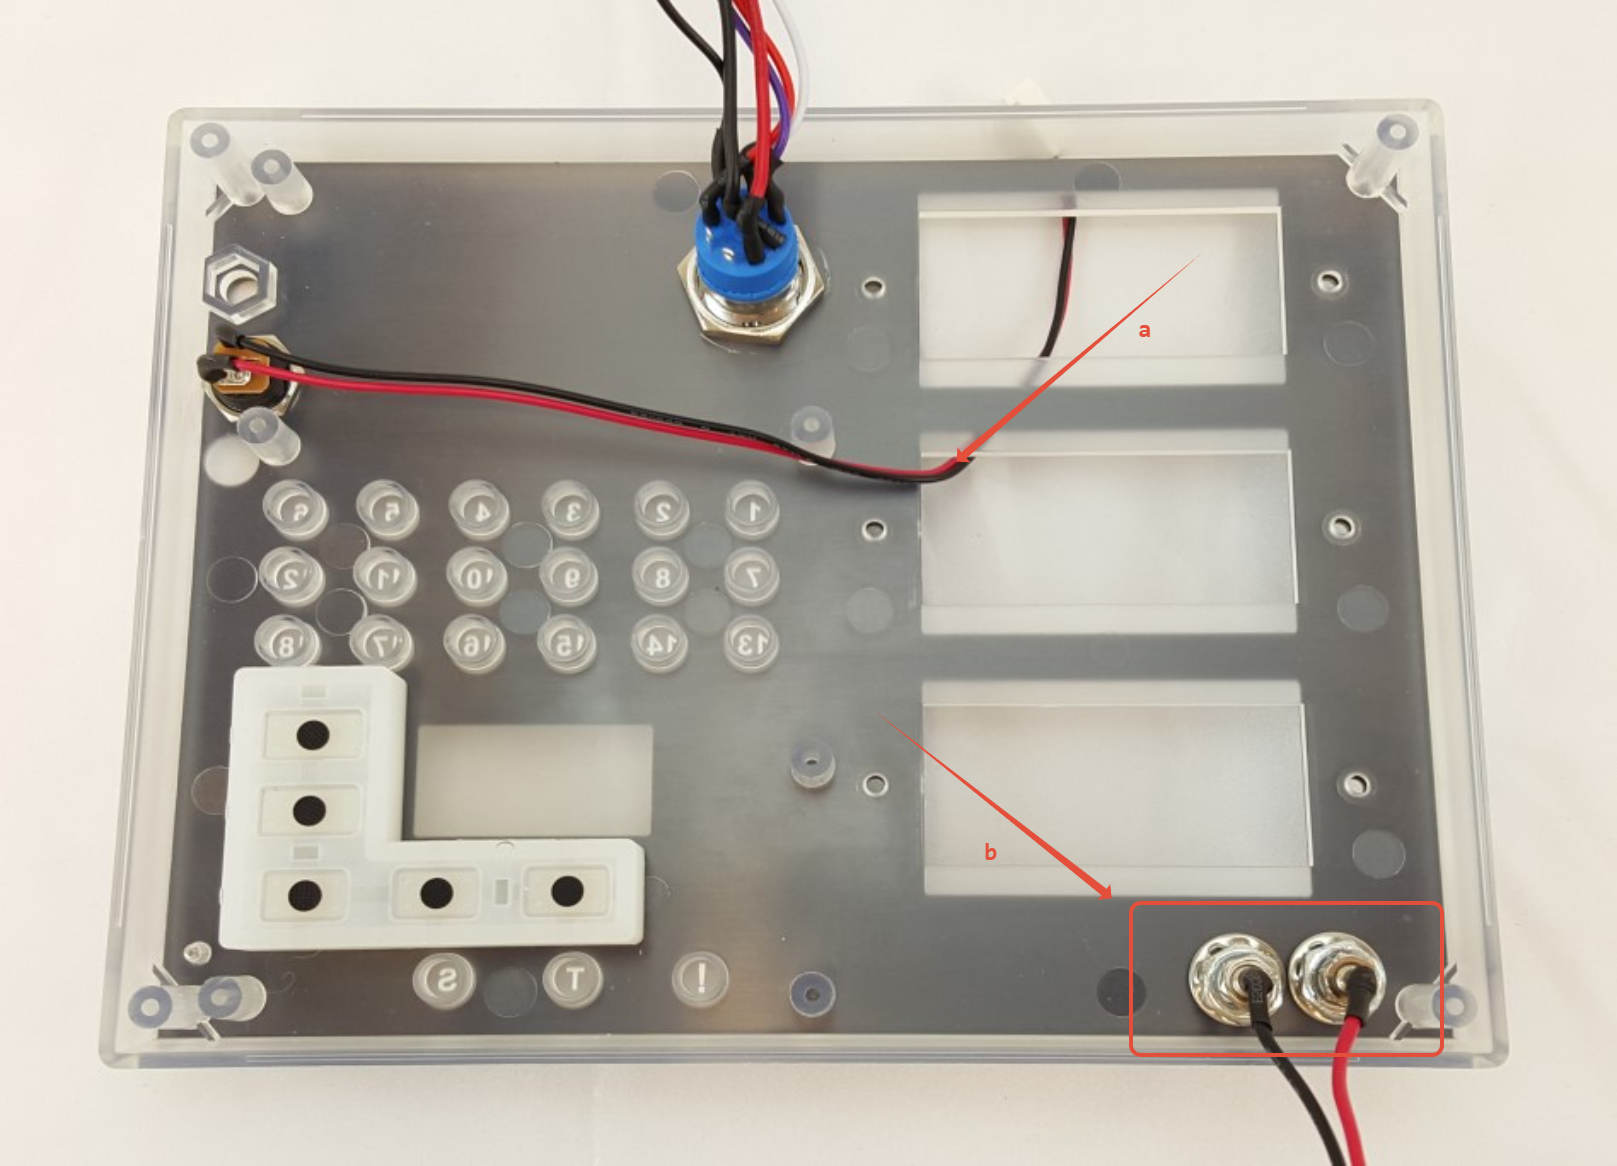
10. Install the antenna connector. Be sure to line up the flat side of the antenna with the flat side of the hole.
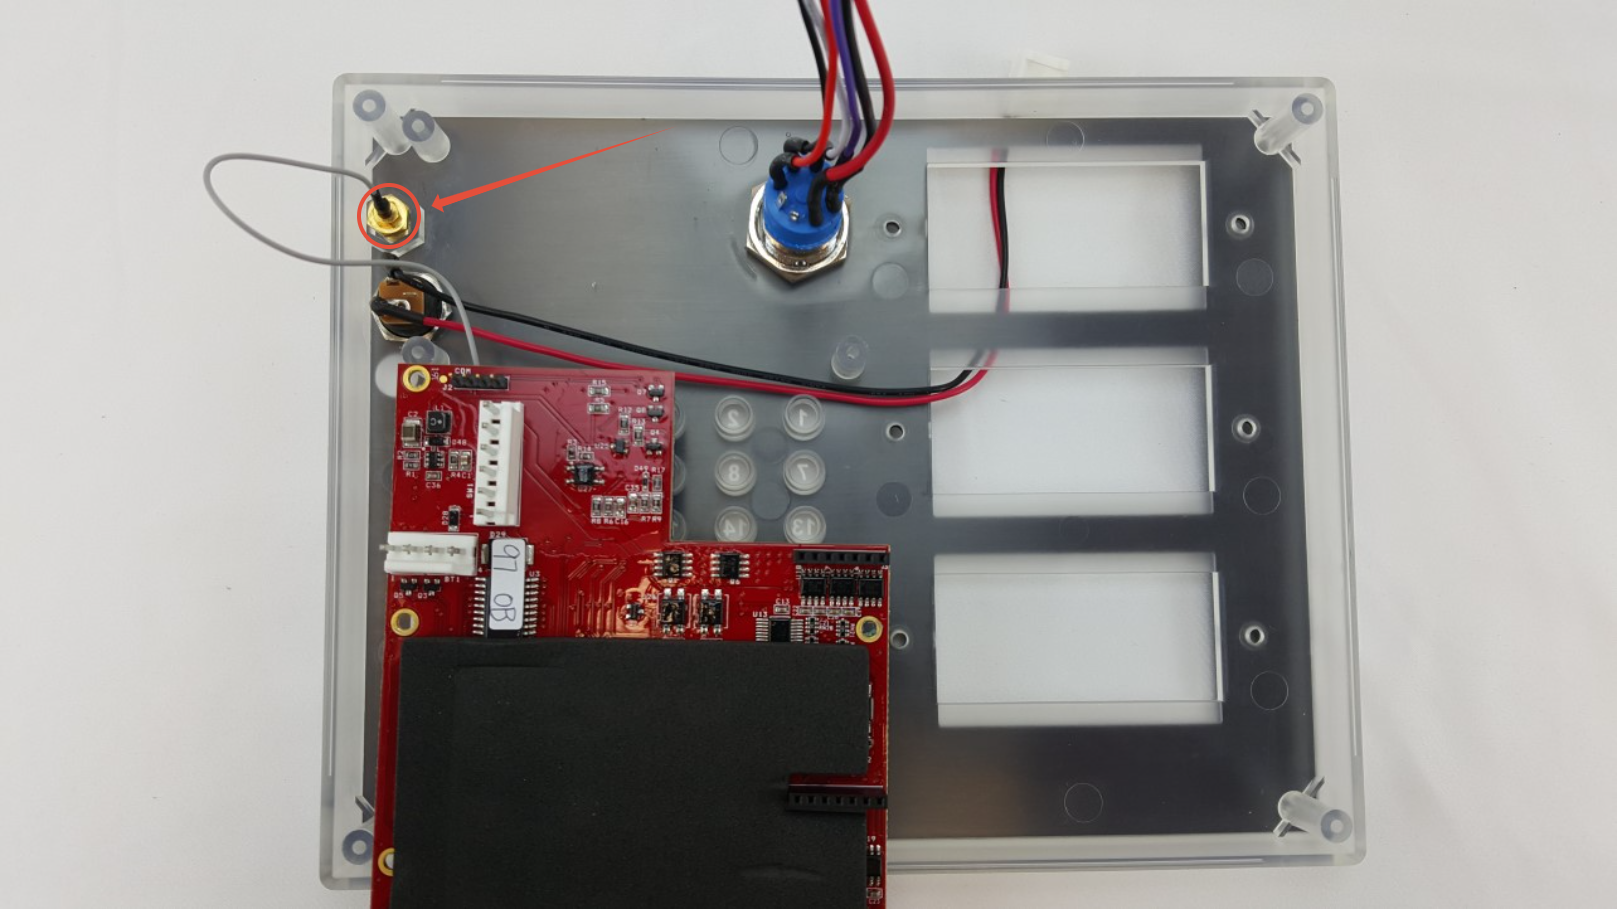
11. Install your motherboard over the charge port and antenna cable using the six small screws you removed in step 3. Be sure the charge port cable and antenna cable are both underneath the motherboard as shown below.
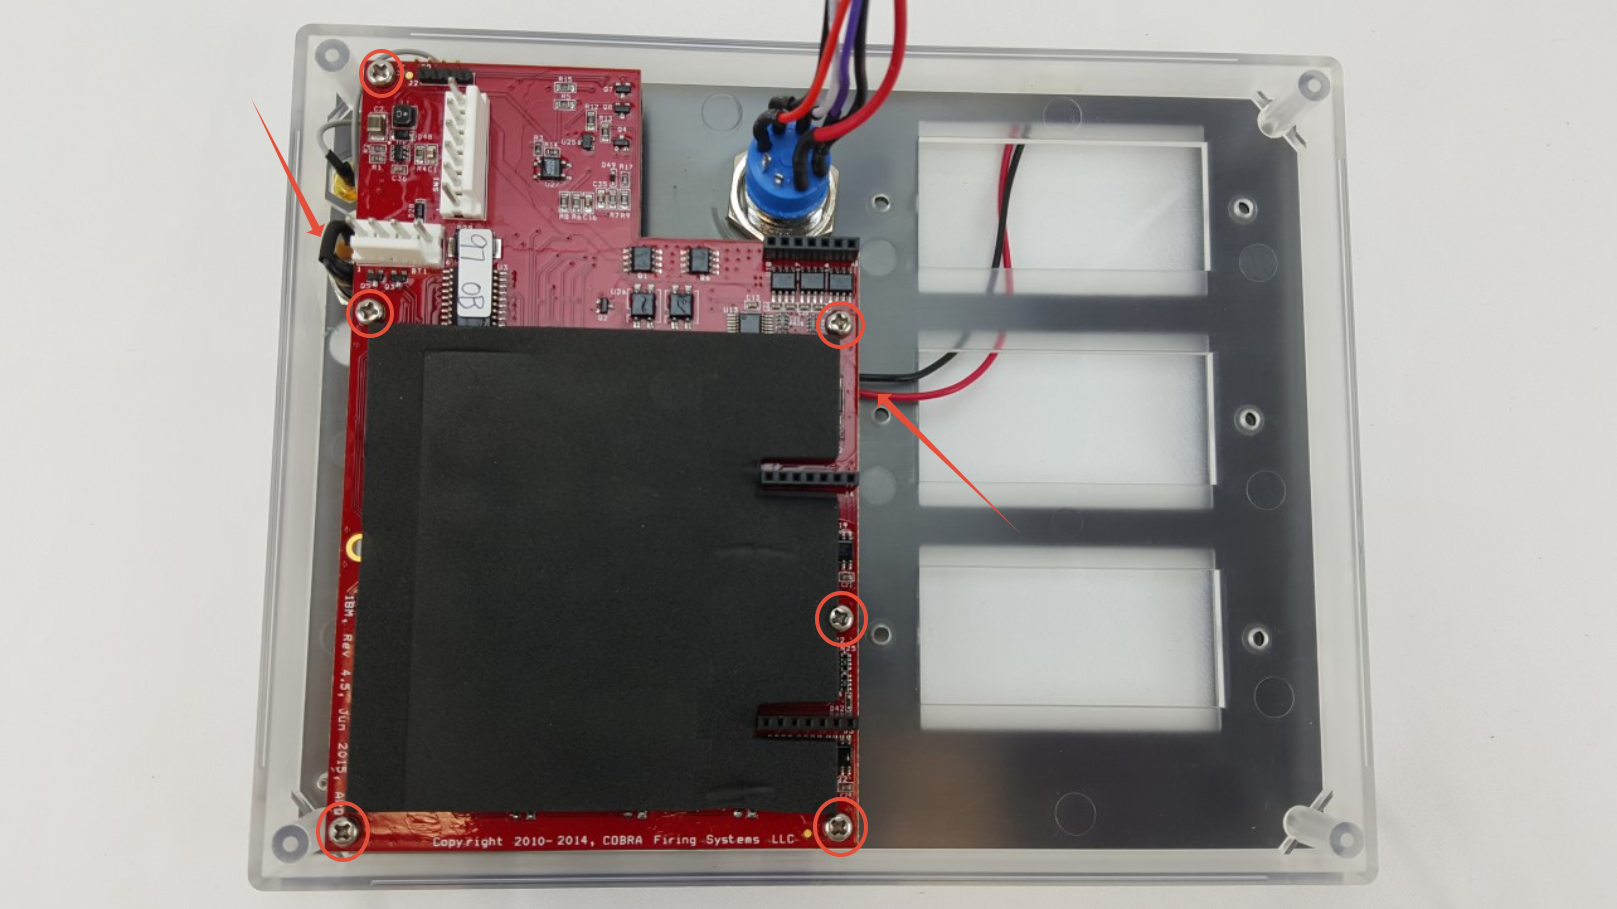
12. Screw the antenna connector nut to the front side of the enclosure. Be sure the charge port cable is still sticking out of the front through the second cue strip bay.
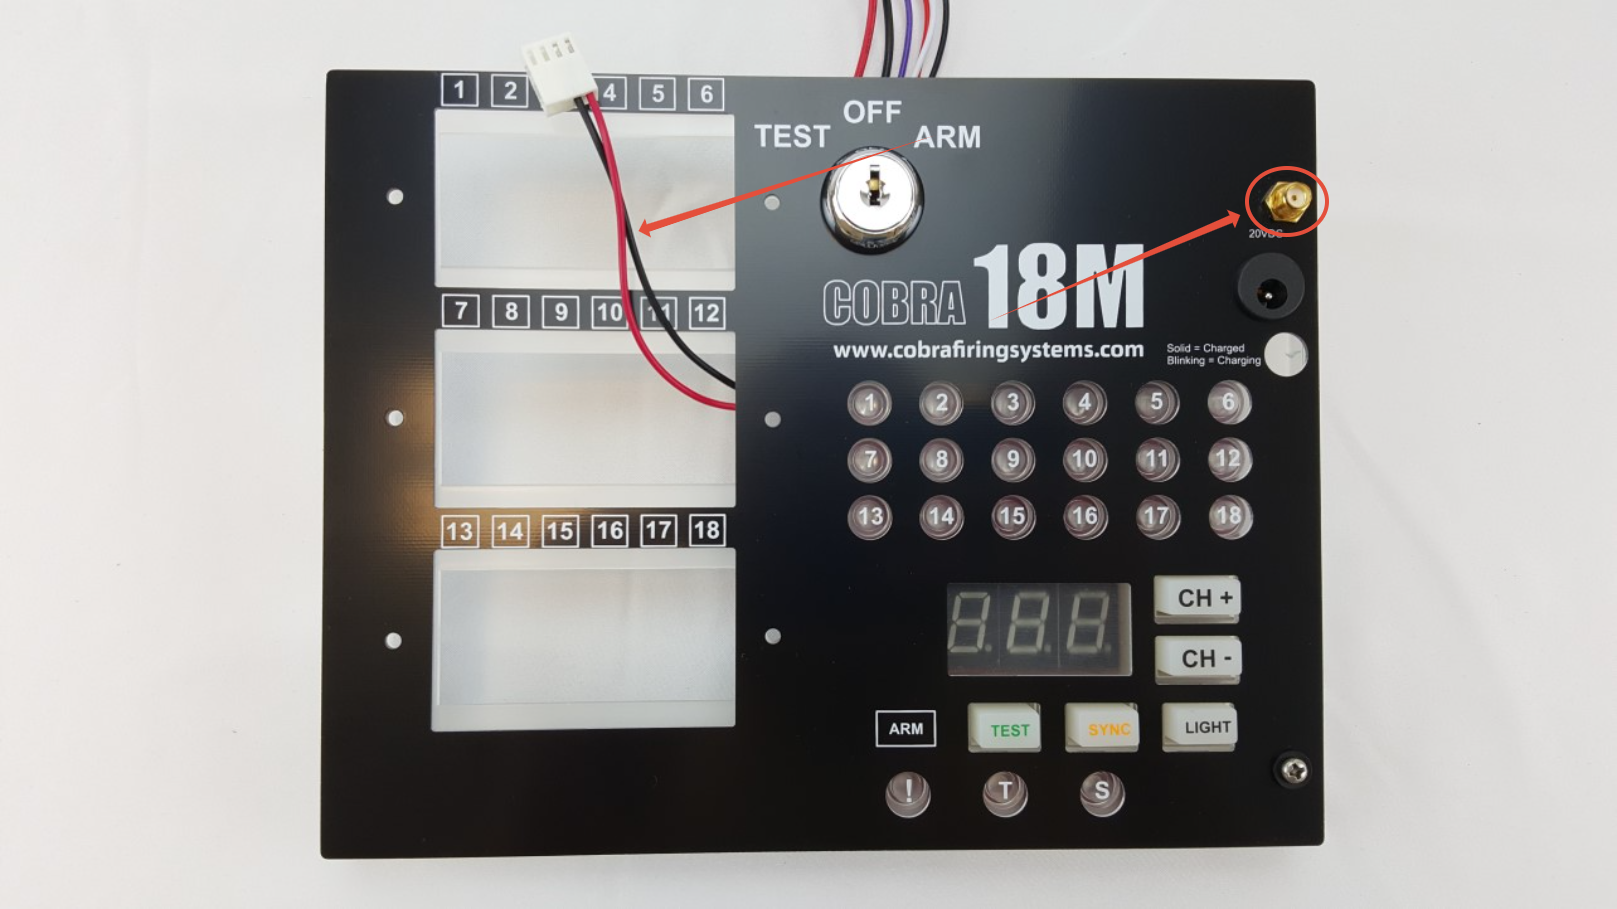
13. Pull the charge port cable out and to the left to give room to install the cue strips. Make sure the silicone gaskets are placed back over the cue strips.
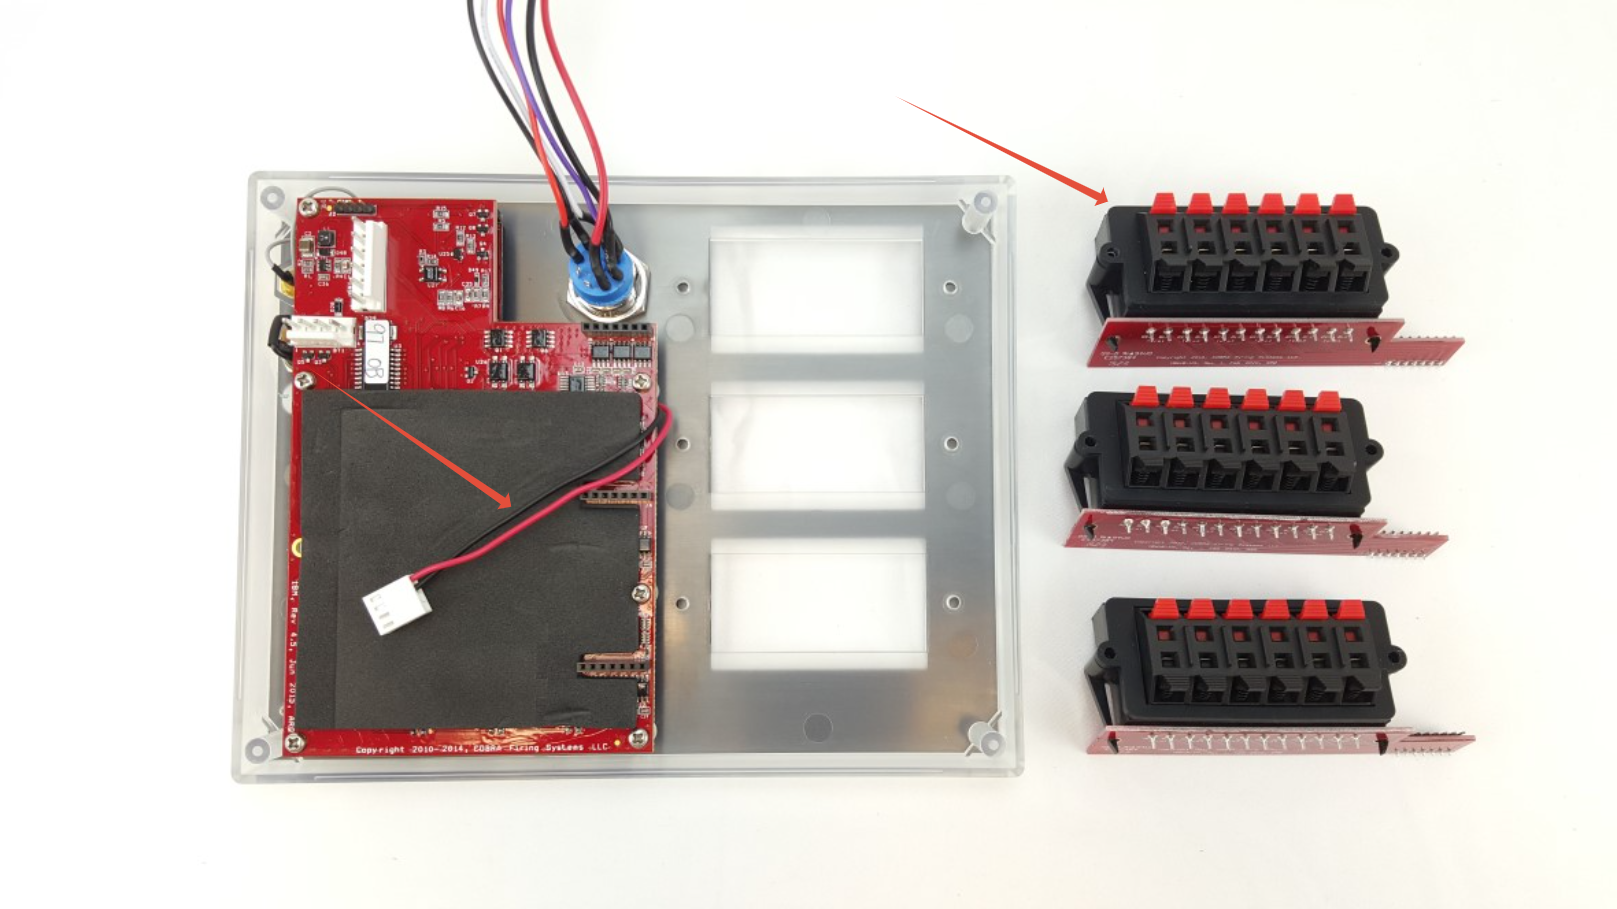
14. Plug in the key switch.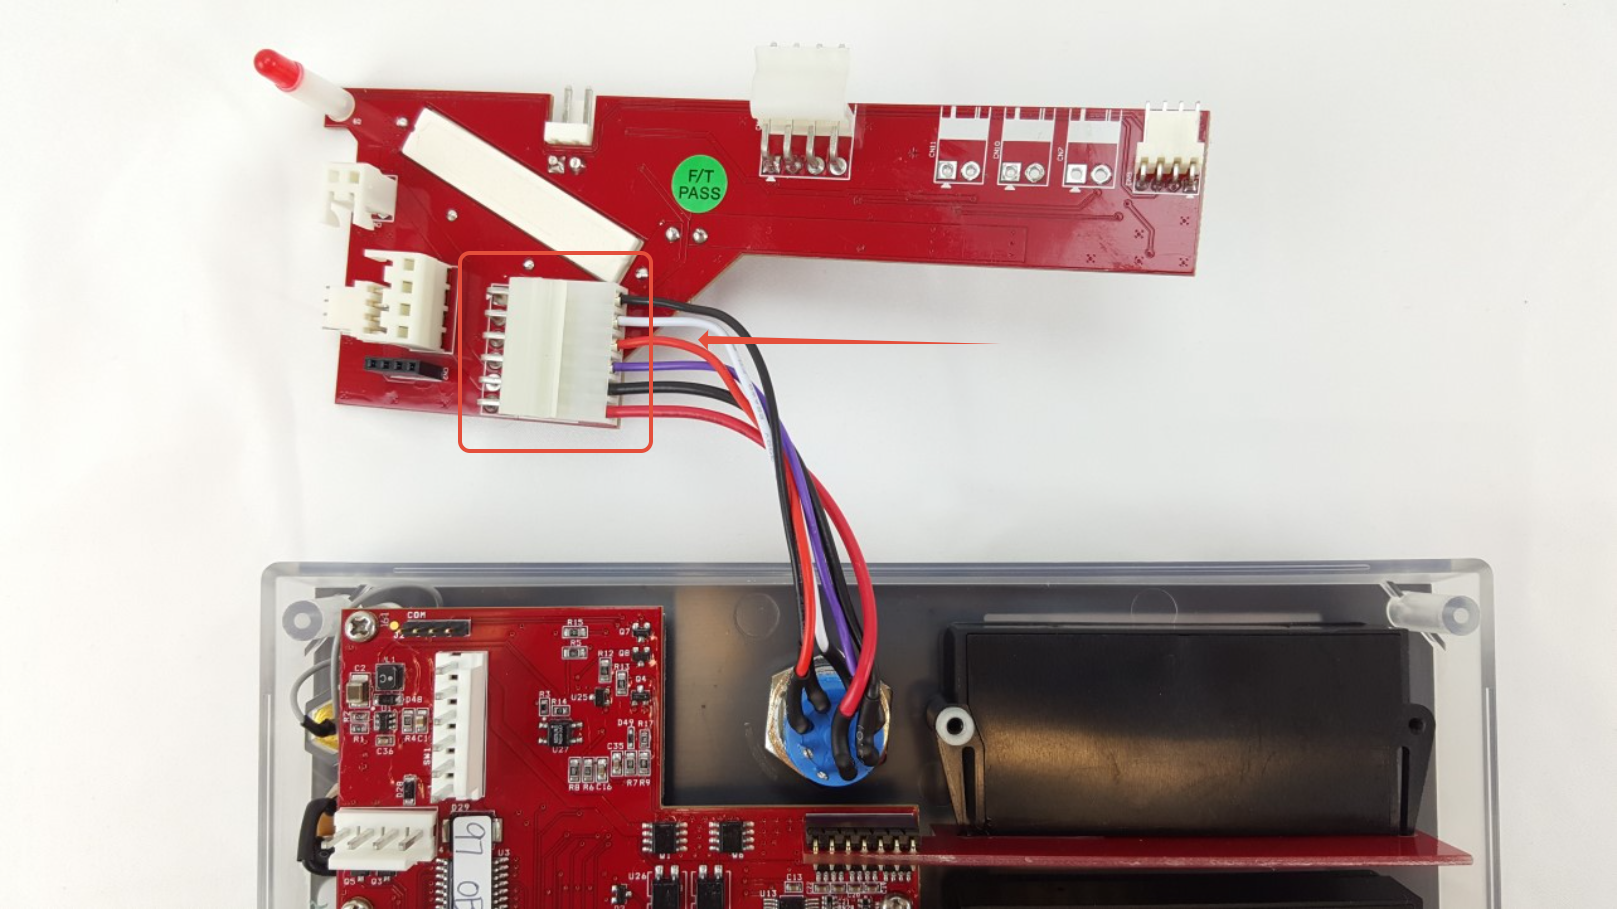
15. Orient the power adapter as shown below. See next steps for plug alignment and installation.
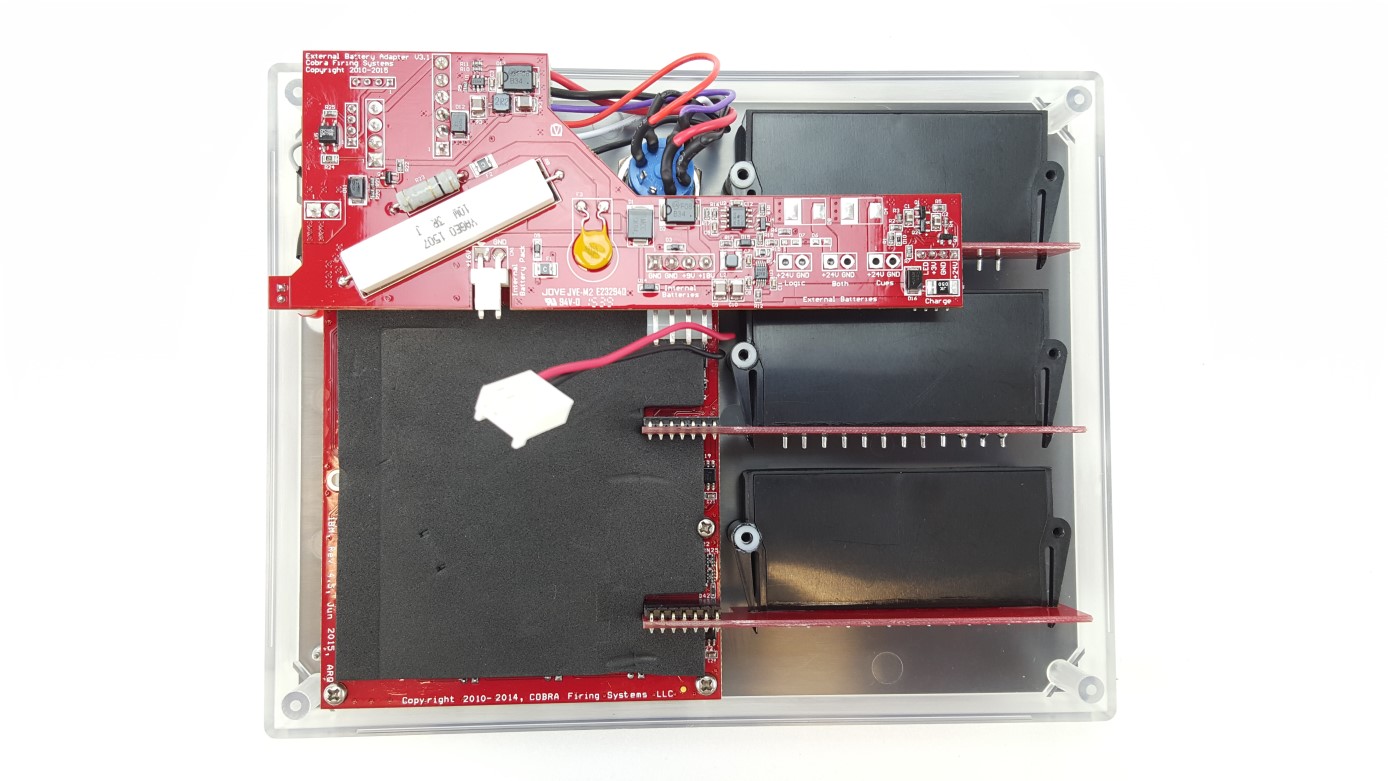
16. While installing the power adapter, make sure the plugs are aligned as shown in the pictures below.


17. Plug in the charge port cable.
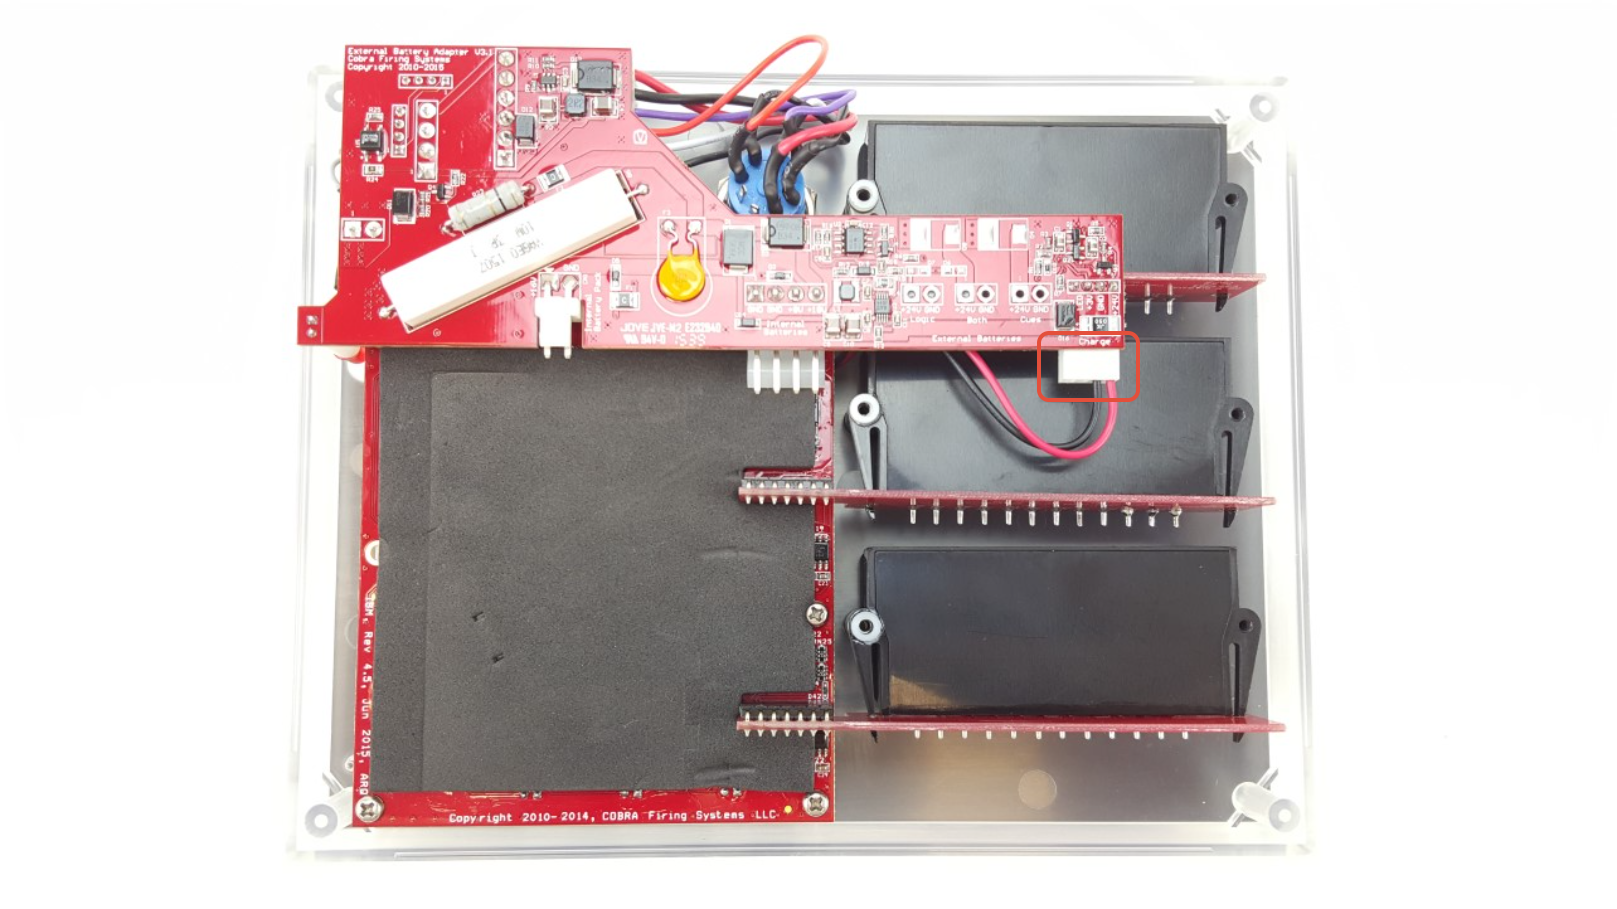
18. Plug in the "Both" power post.
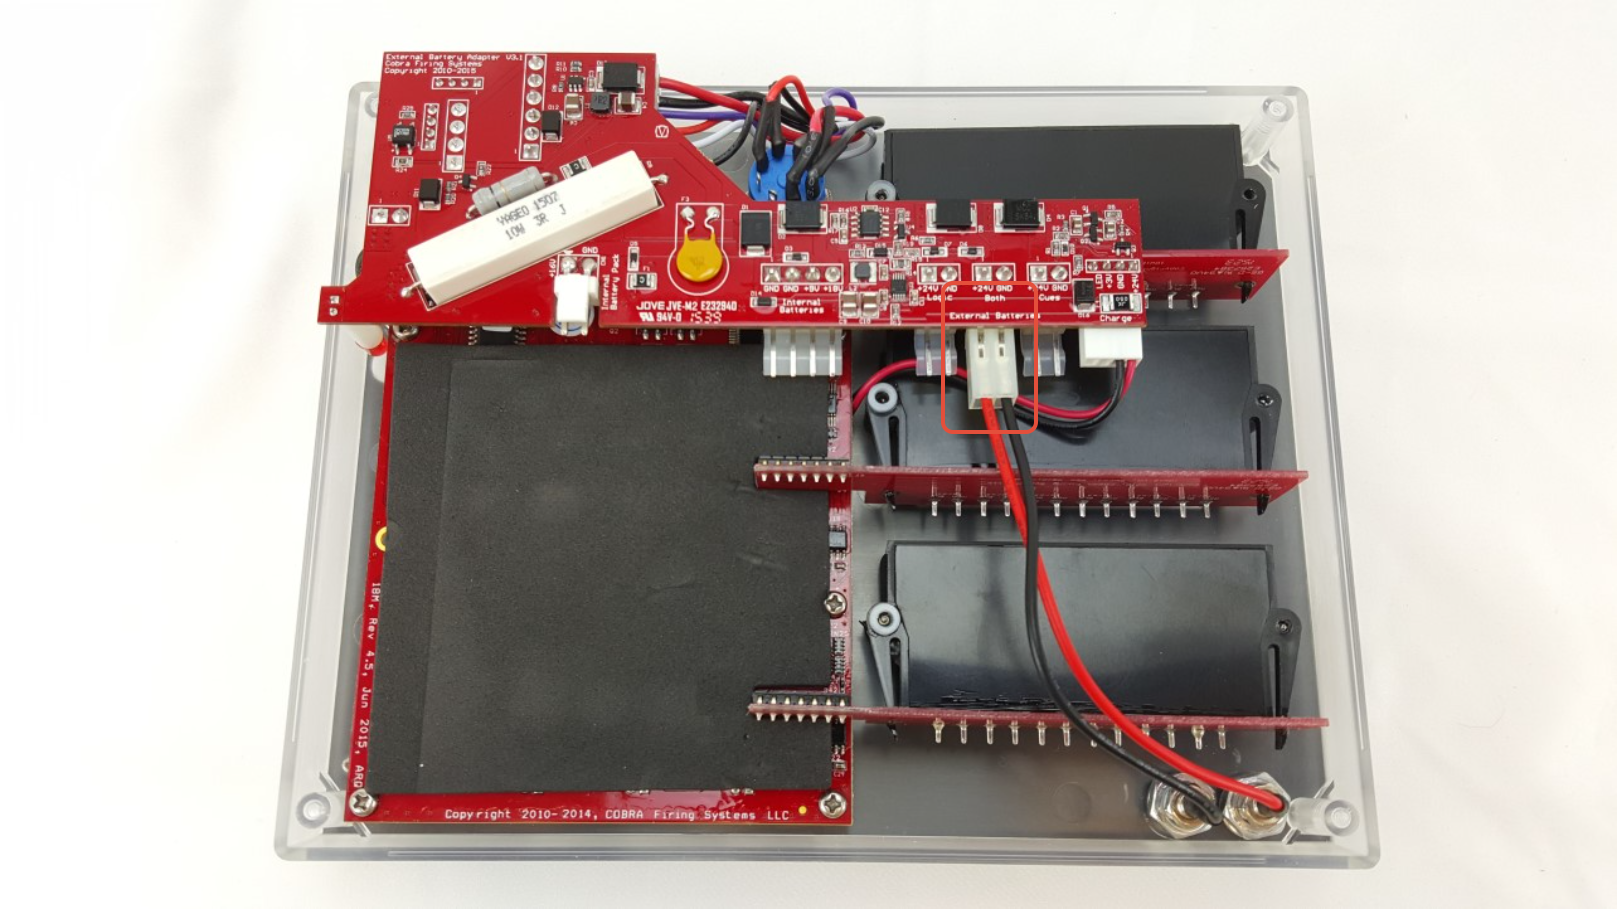
19. Plug in the battery harness.
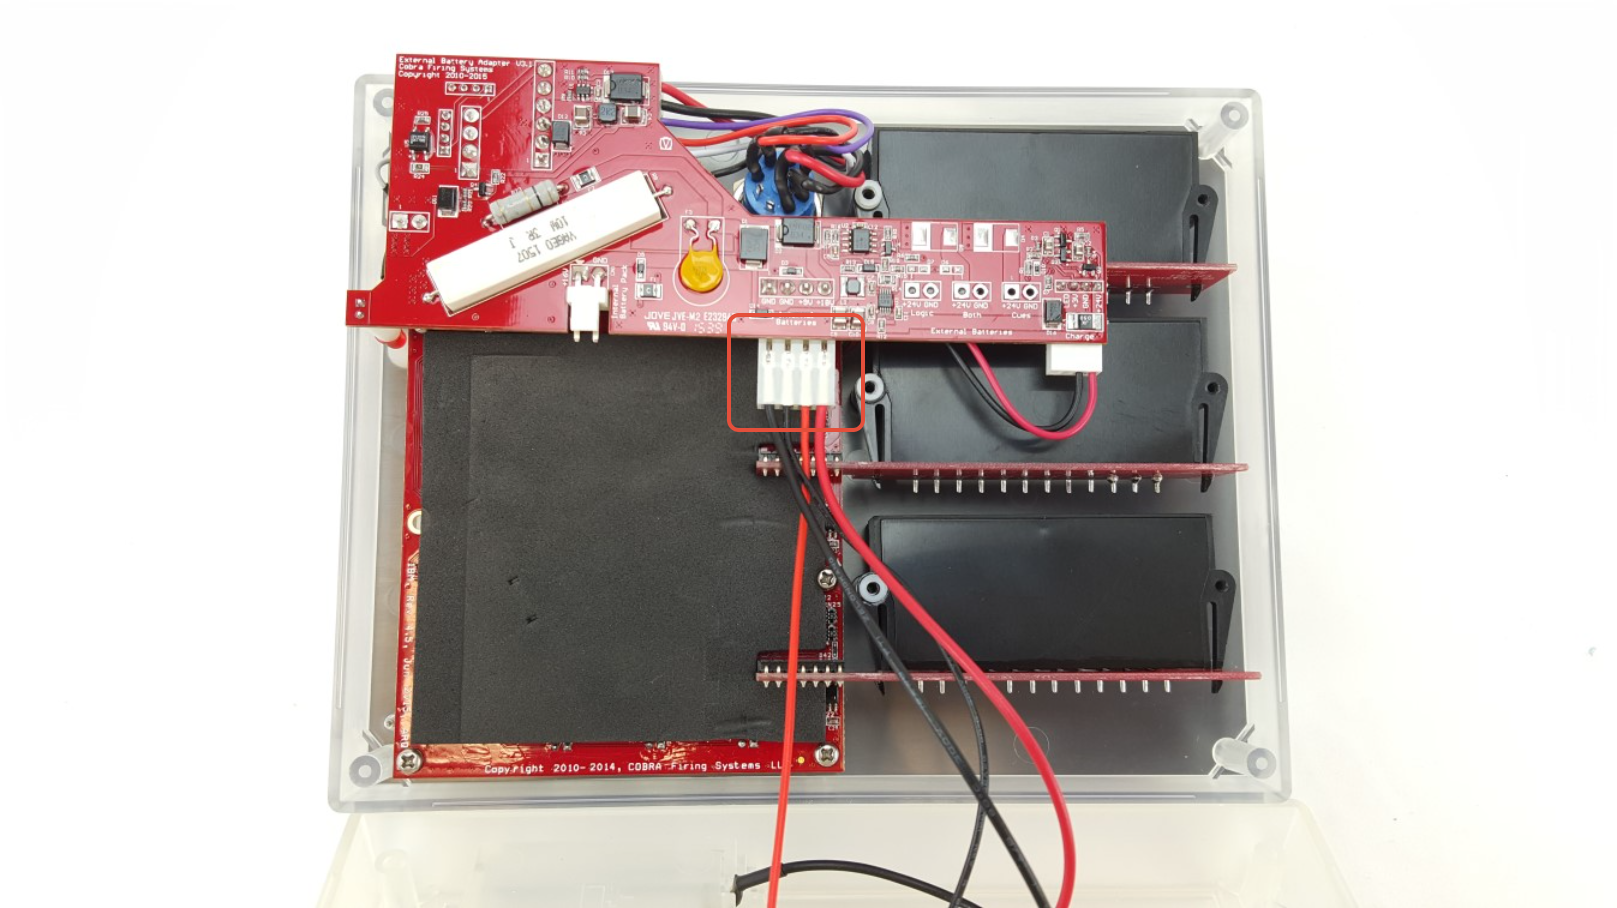
20. Make sure no wires are being pinched by the enclosure, standoffs, or behind the battery compartment. Then, reinstall the four screws into the back of the module. Do not overtighten.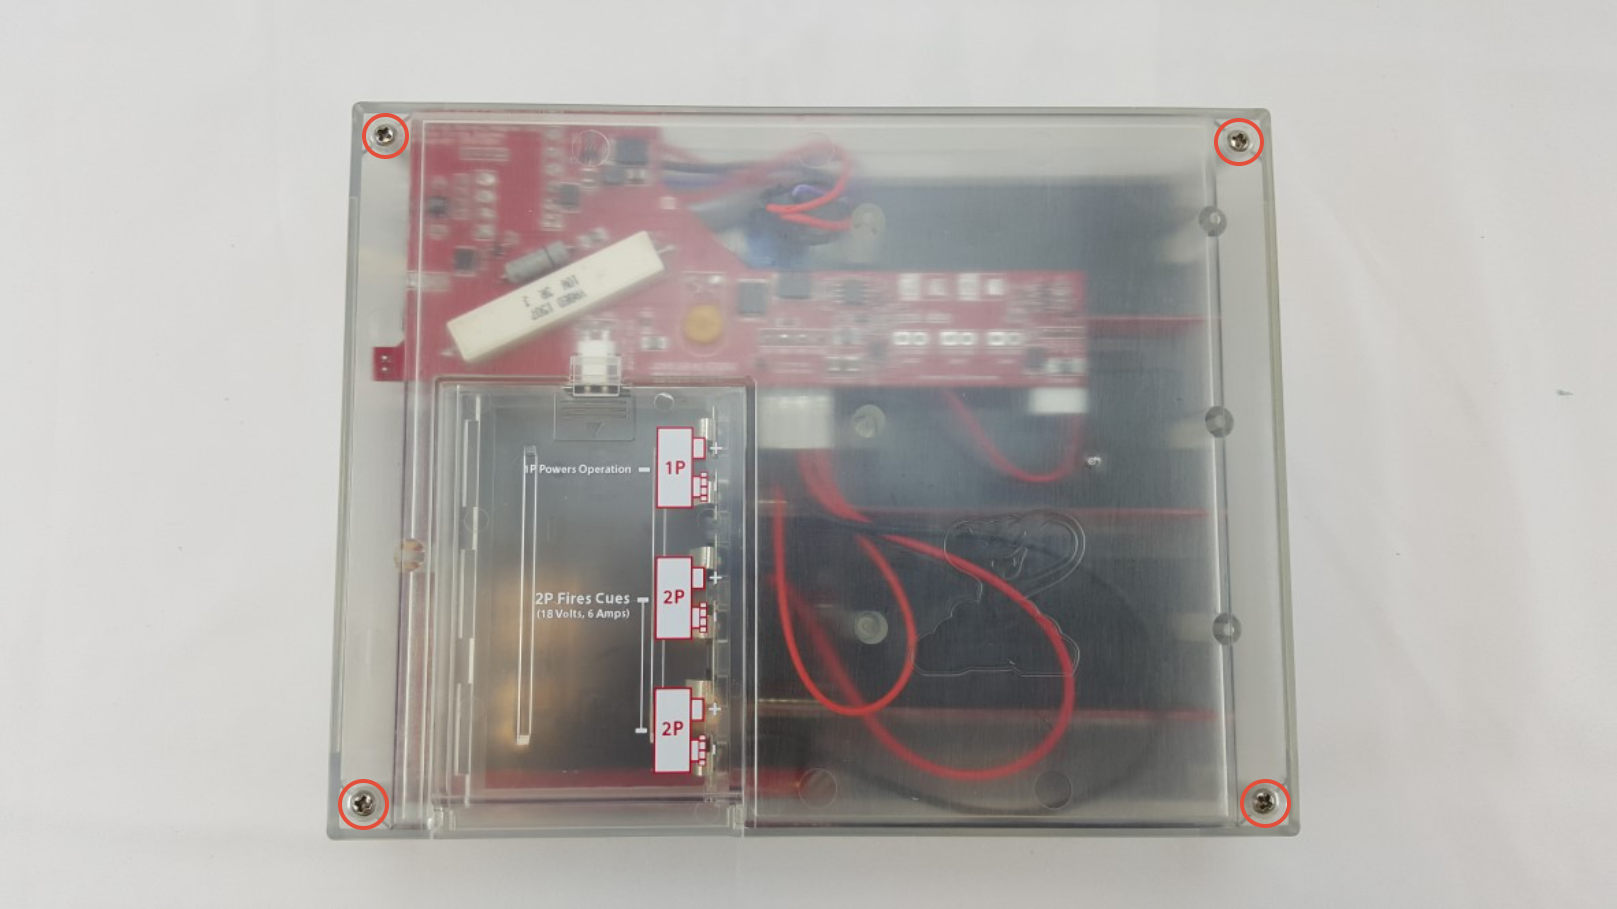
21. Reinstall the six screws into the front of the module. Make sure that the washers are on the screws. Stop tightening once the screw height contacts the top of the washer. You are now finished with the installation process!
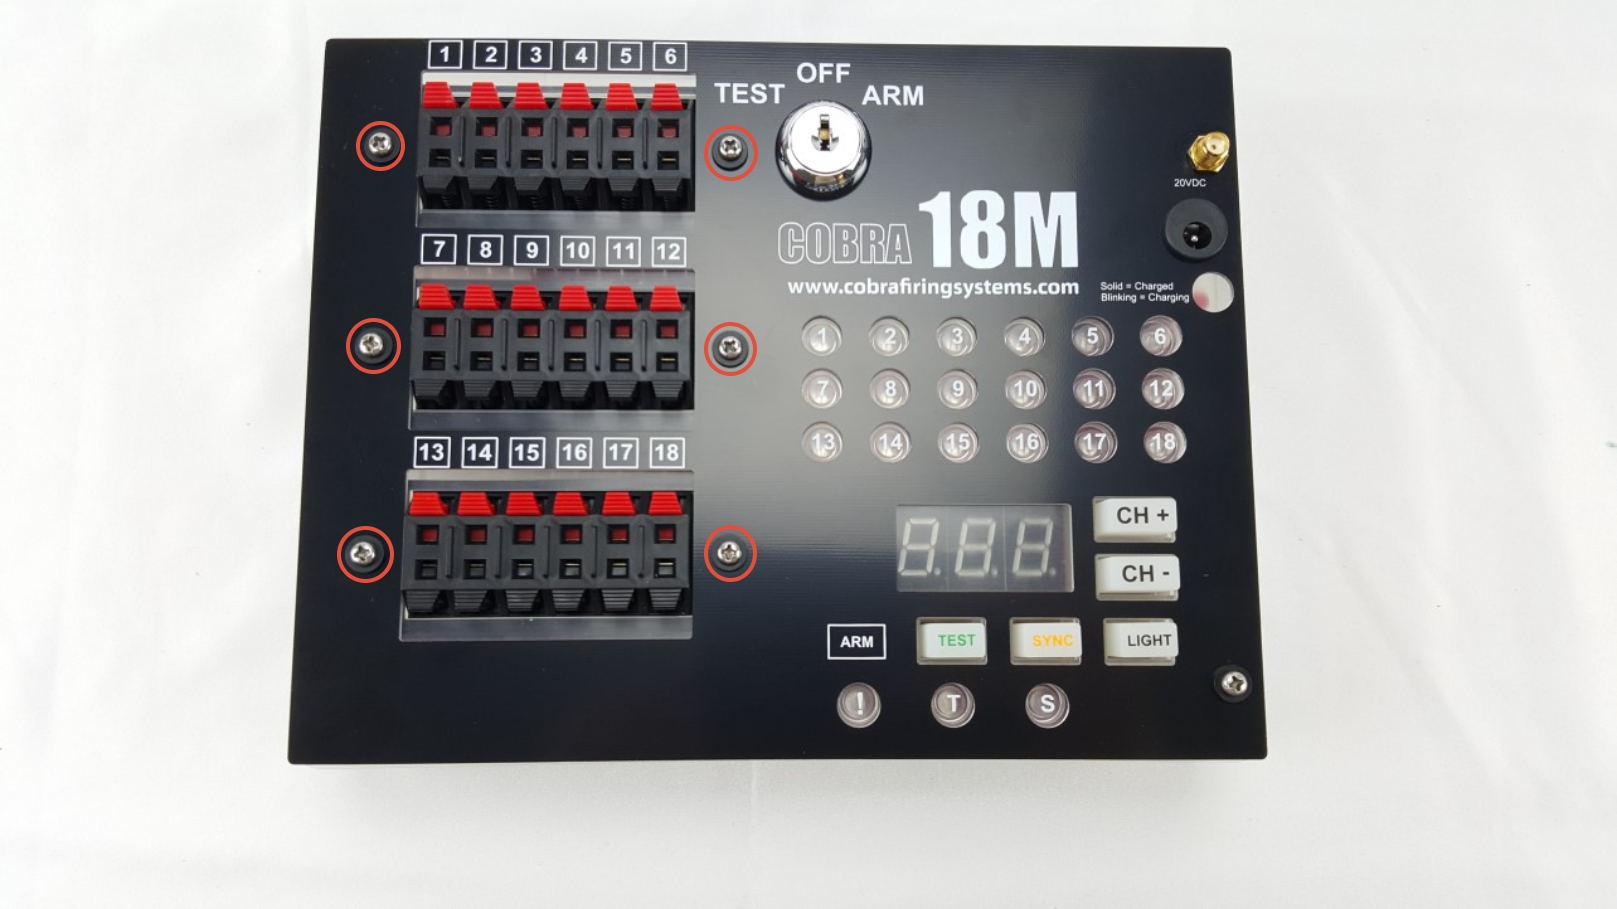
18M Power Adapter Calibration Instructions
This is required for the module to display correct battery levels both on startup, and when sending low-level battery warnings to the 18R and 18R2 remote. If you have already received an 18M with a power adapter installed by COBRA, you do not need to perform this process as this has already been done by the COBRA team for you!
If you get stuck, you can contact us at help@cobrafiringsystems.com or call us at 518-741-4300. We are here to support you.
How it works
The wireless re-programmer is a small device that connects to your PC via USB. You can use this device with Our COBRA Re-Programming Software to upload the latest COBRA software to both the remote, firing modules, and audio box. The entire process is done wirelessly without opening the system enclosures.
Required Hardware
You will need the following hardware:
- 1 PC running Windows operating system
- 1 COBRA Wireless Re-programmer
Initial Software Setup
This step explains how to install the COBRA Re-Programming Software, which is used in the reprogramming process. You only need to perform the initial software setup once.
Step 1
Download and Install the COBRA Re-Programming Software by going to How to Upgrade COBRA Firmware, and clicking on the link to the CRS program.
Step 2
Connect the SNAP wireless re-programmer to a USB port on your PC. In the lower right corner of your PC, you may see the device as recognized and installing. If you don’t see the device install, that is OK. You are done the initial software setup step.
Load the Calibration firmware
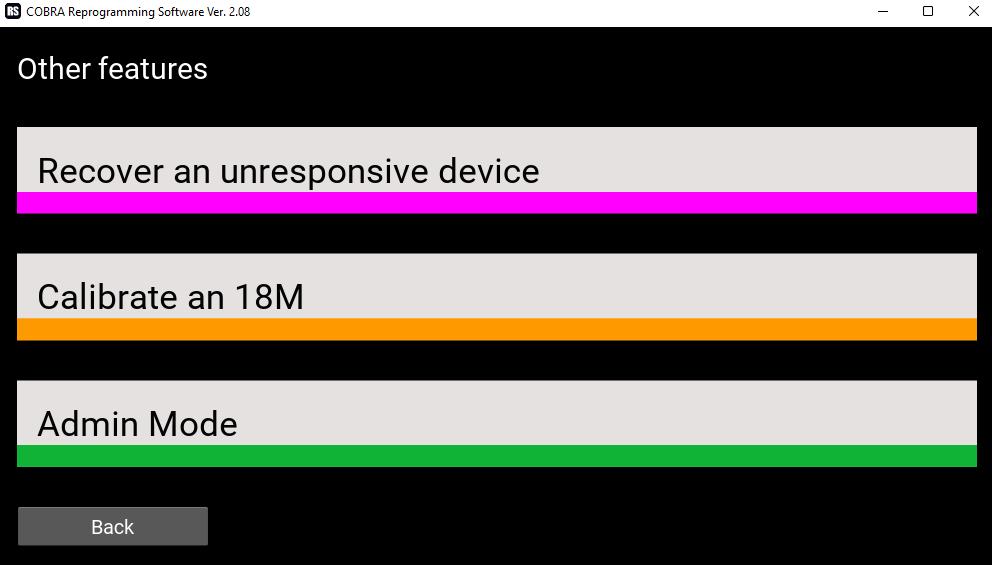
1. Open up the COBRA Re-Programming Software, and select the Other Features tab in the bottom right corner.
2. Select the option Calibrate an 18M.
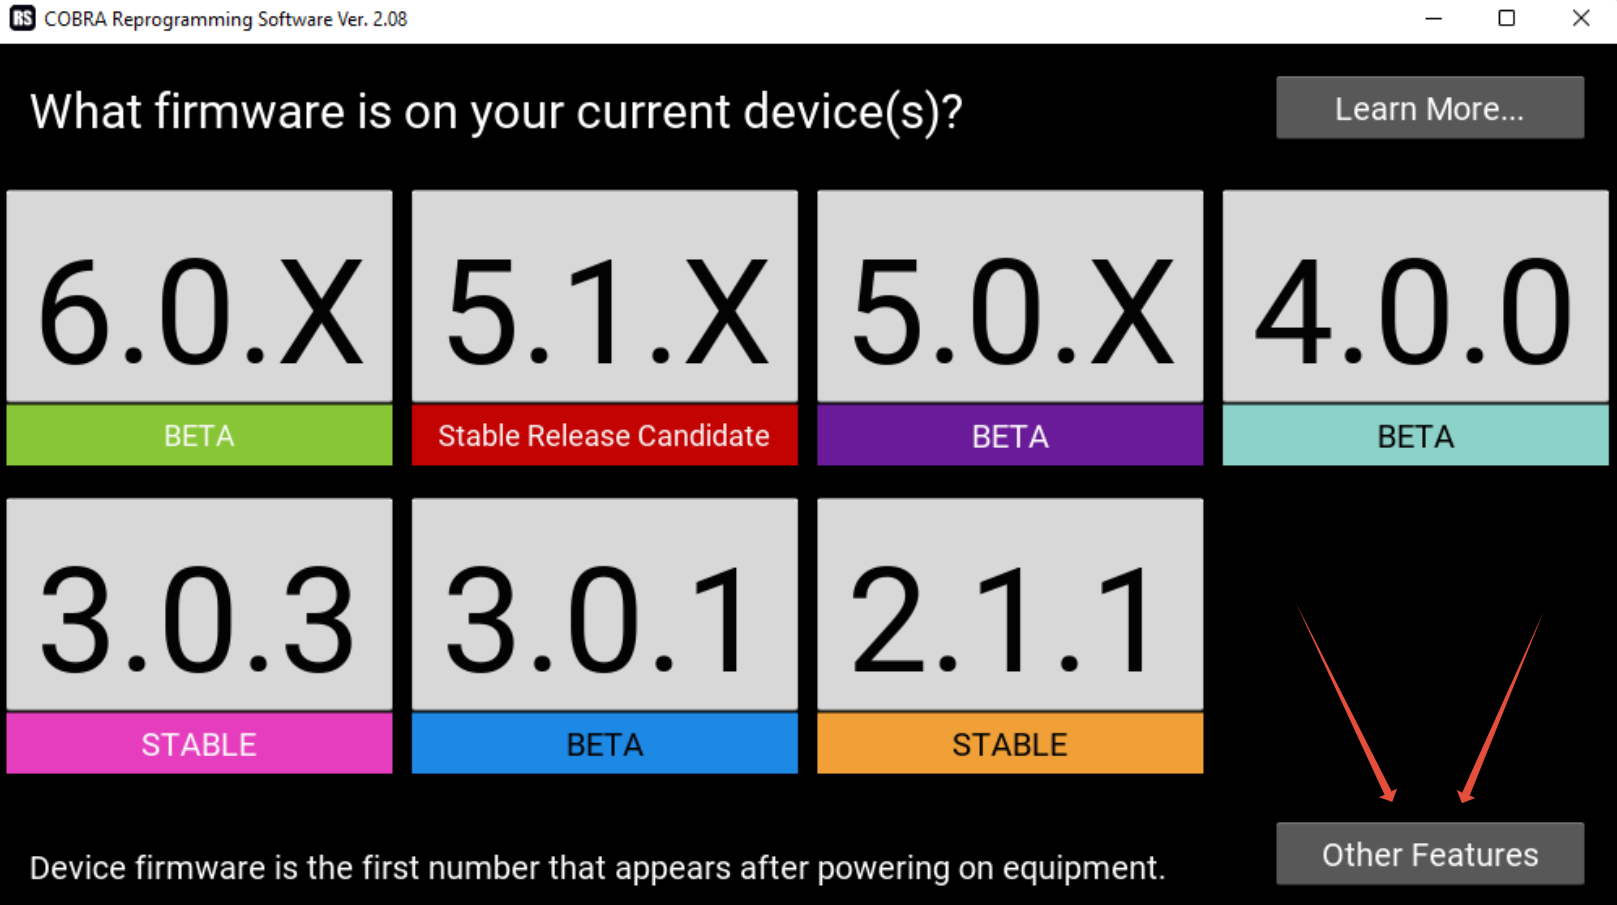
3. Select the current firmware that your 18M is running, which you can find by turning your 18M to the test or arm position and noting the first 3 numbers that appear on your device.
4. Place your module into Program Mode, by holding the SYNC button until you see the letter P appear on the module. There is a link to a video on how to do this within the CRS.
5. Click Next on the COBRA Re-Programming Software.

6. The Software will search for your 18M using the Wireless Re-Programmer, once it finds your device it will display the number of devices found. Click Next to begin the Calibration process.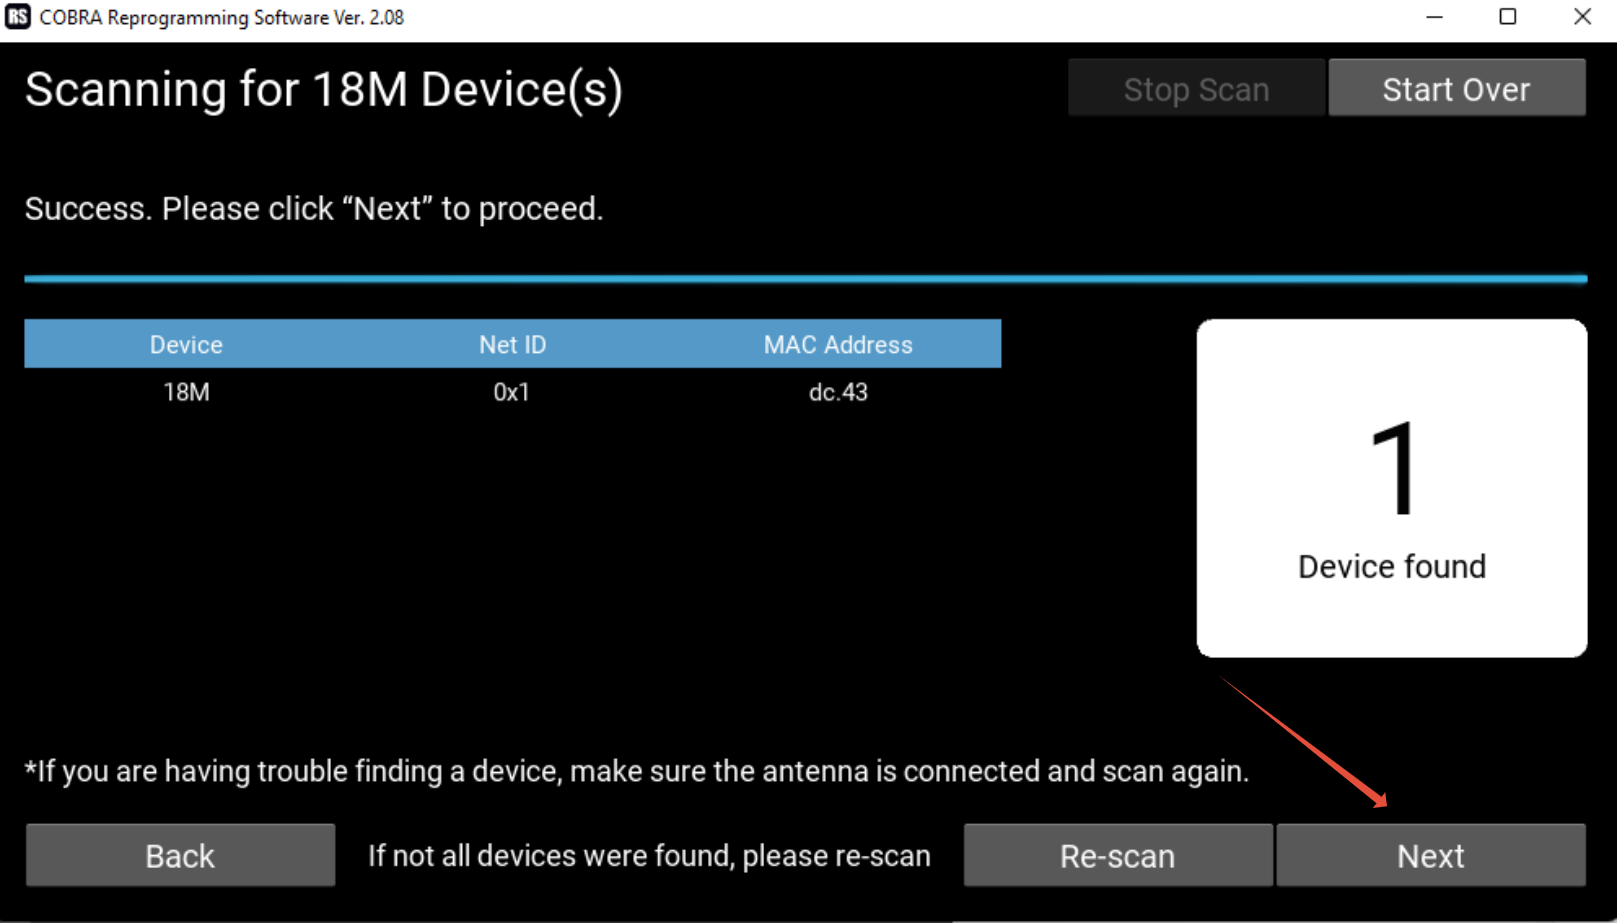
7. Once the Calibration is complete, click Next,
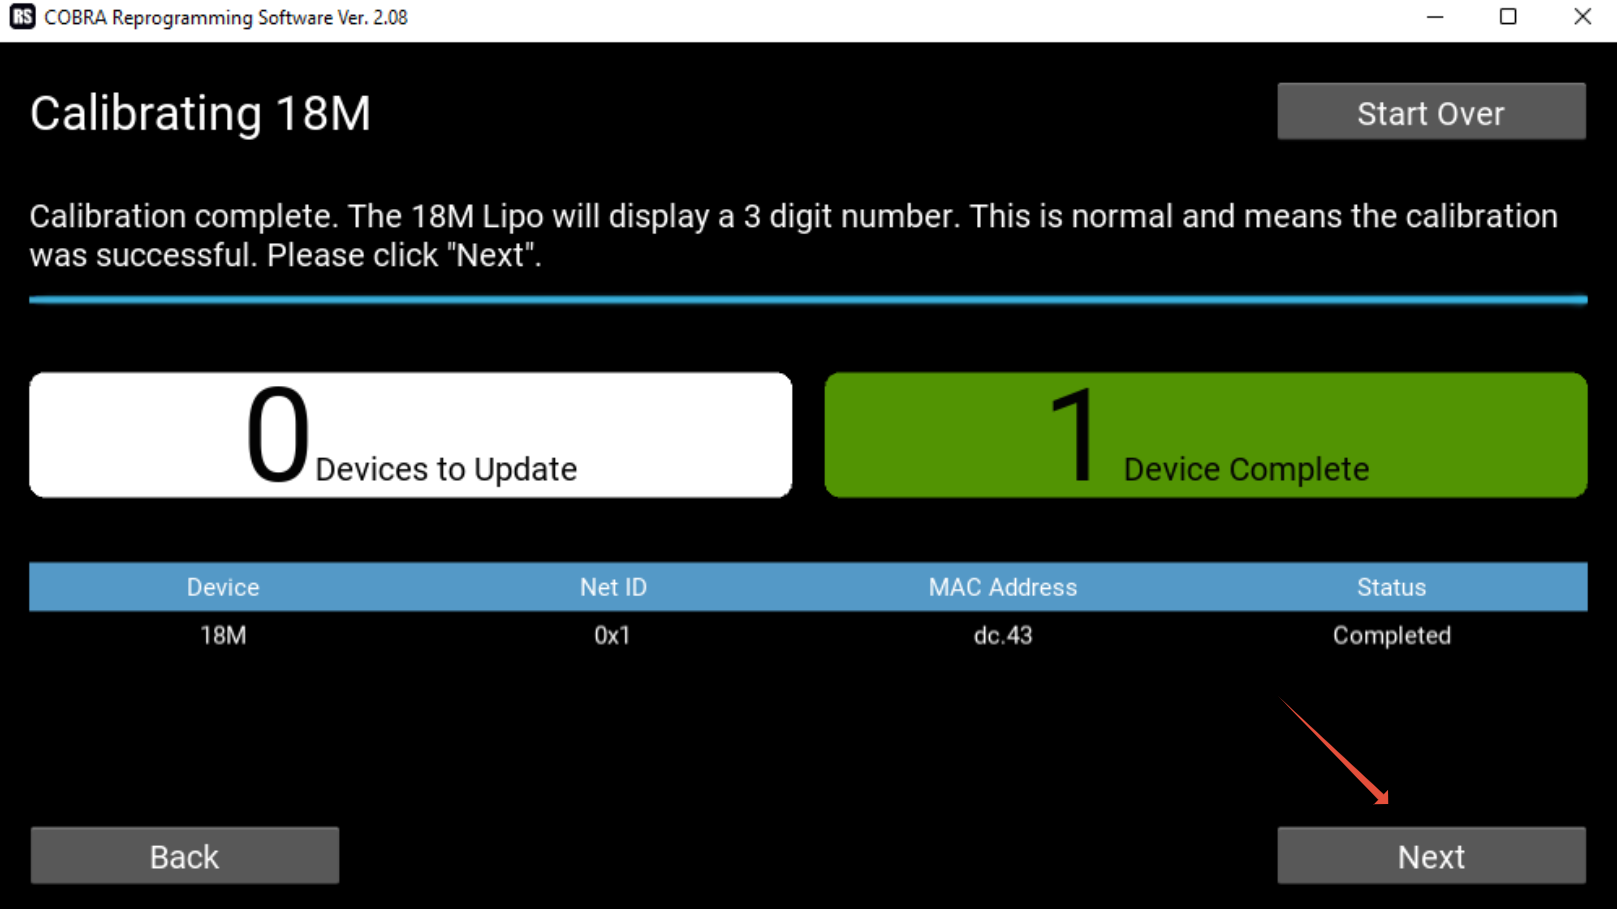
8. CRS will once again scan for your device, click Next in order to update the firmware back to the version the 18M was on when you started the calibration process.
9. Once the update is complete, turn your 18M off and on again to confirm the firmware was updated. You've successfully calibrated your 18M.
Help! My device is dead.
If you have a device that won’t power on due to a timeout or other issue, it’s likely that the firmware was improperly loaded or corrupt. To fix the unit, please follow the following steps.
1. Power on the device, even though it looks like it’s dead.
2. Start the COBRA Re-Programming Software, and click the Other Features link on the bottom right.
3. Select the hardware type from the options on the screen. If you're unsure of the hardware type you have, select the What hardware version am I operating? link from the CRS screen. This will take you to our website and give you a few ways to find which hardware version you're possessing.
4. Select which firmware version you'd like to load on to your device.
5. The CRS will scan for your device, once it's found click the Next button.
6. The CRS will now update the firmware on your device, which should re-start your device.
Comments
Article is closed for comments.