|
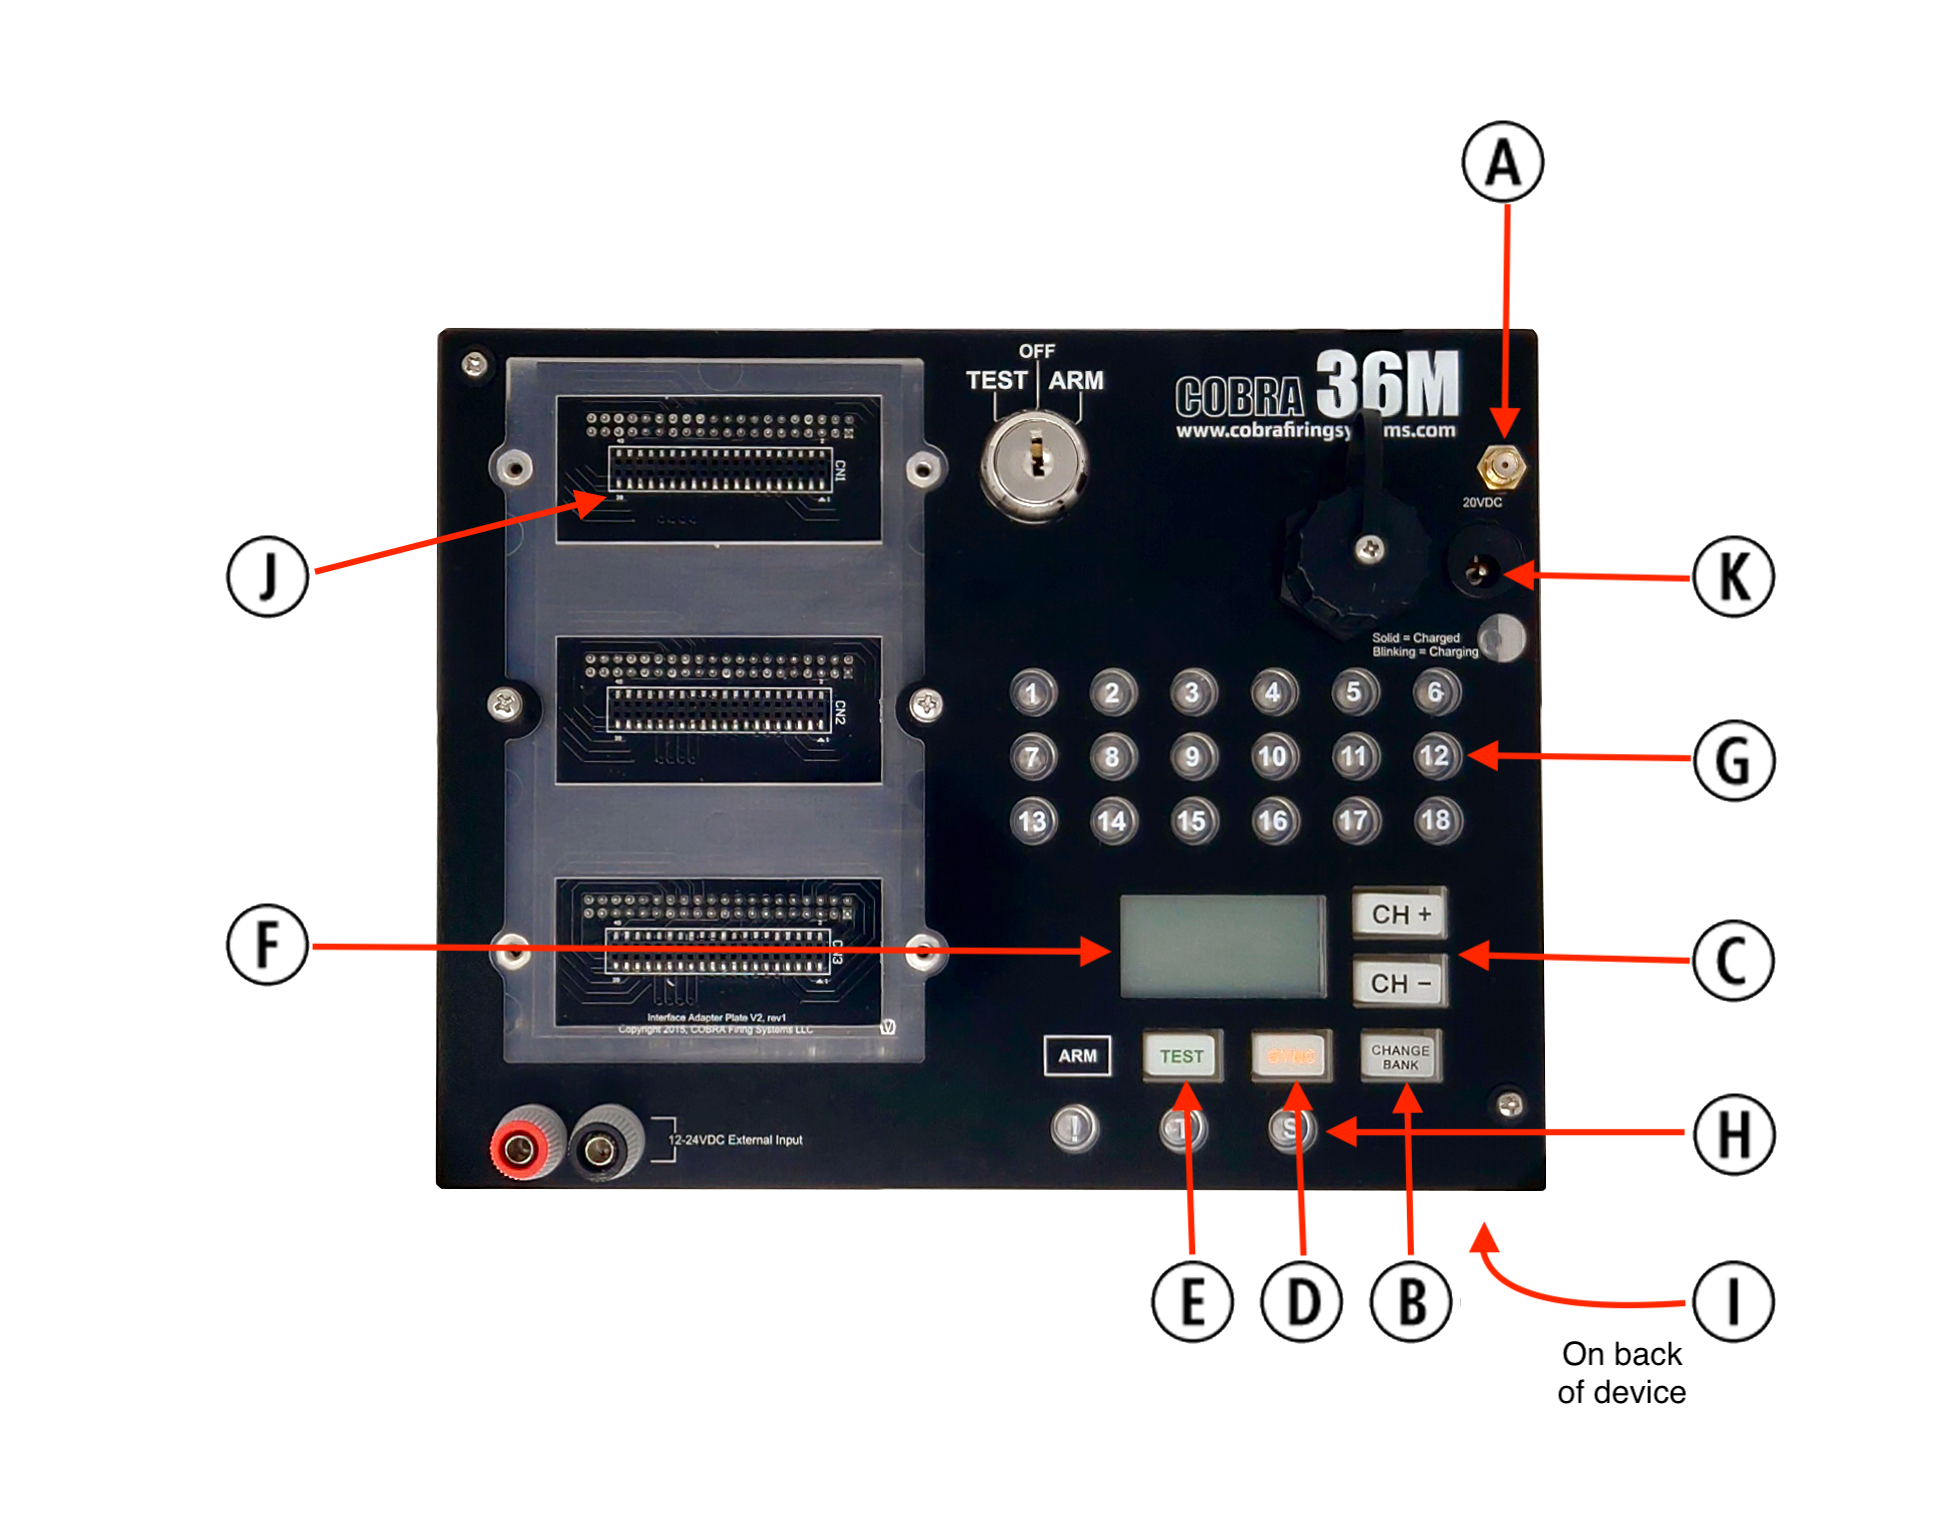
A) Antenna Connector Connect the standard omnidirectional antenna, COBRA Booster, COBRA DISH, or a combination of the three. |
B) CHANGE BANK Button Press and release to cycle between module banks. See Banks & Channeling for more information. |
|
C) CH+, CH- Press and release to increment (CH+) or decrement (CH-) the channel for the selected bank. |
D) SYNC Button Used to synchronize the module to your 18R2. Also used to place the module into Program Mode when performing firmware updates |
|
E) TEST Button Used to check continuity locally on the module. |
F) Main LCD Display Displays the module's battery life, address, bank & associated channel, and signal strength. See Viewing the Main Display for more information. |
|
G) Cue LEDs Displays the module’s continuity and firing status. |
H) ARM, TEST, and SYNC LED The ARM, TEST, and SYNC LED indicators. |
|
I) Battery Compartment Used to store the COBRA internal LiPo battery pack or 9V batteries. |
J) Pro-Adapt Plates & Mating Connector The 36M and 72M employ a connection agnostic design that supports onboard cues, slats, and Quickplugs. See Connection Options & Pro-Adapt Plates for more information. |
| K) Charge Port and Charge LED Indicator Only use a COBRA charger when charging a module. The charge LED indicator blinks when charging and is solid red when fully charged. Charge time is 6 hours from P0 to P9; do not use the module in a live show when the charger is plugged in. |
Comments
Article is closed for comments.